Seeded Malt Loaf Made With an Overnight Sponge

Using a pre-ferment in this bread really improves the flavour, we lose the prominent commercial yeast flavour and gain a light fruity fermented flavour. In short, this loaf tastes wonderful.
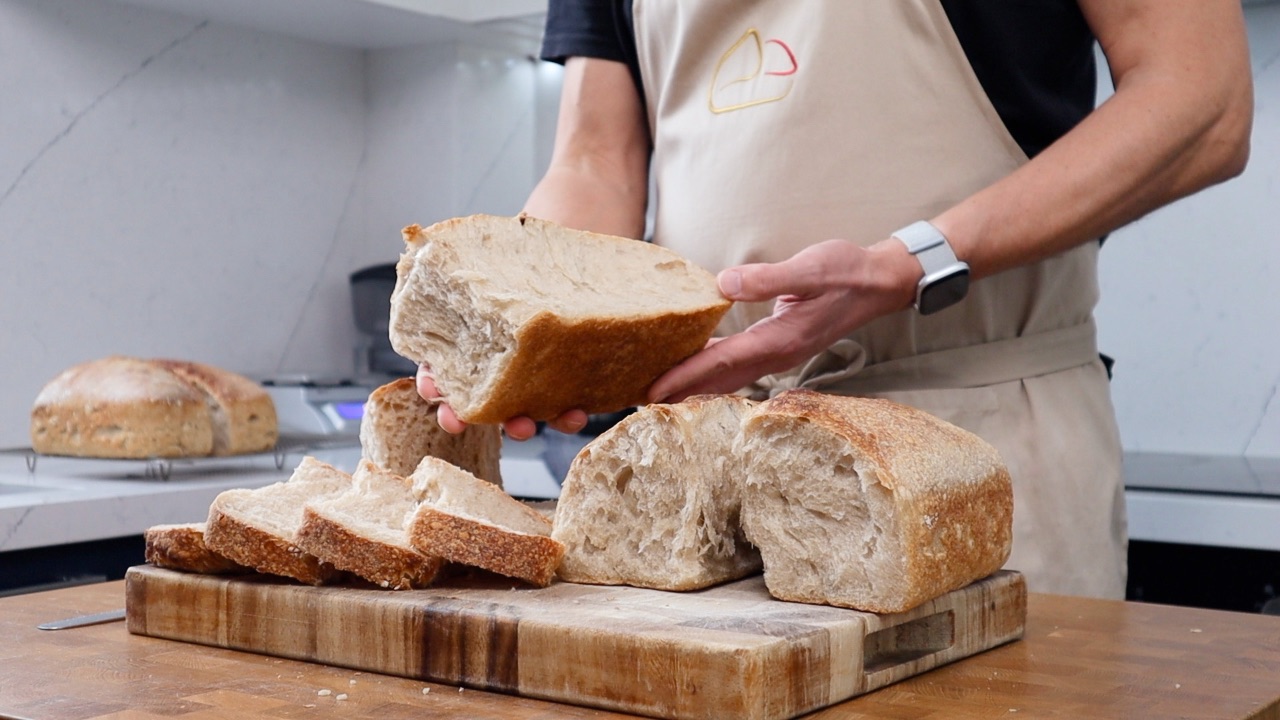
The crumb is extremely light and soft and the crust is crackly and a little chewy. It’s addictive, and for that reason I like to bake it on a weekend morning so me and my family can devour it in one day!
Ingredients
Pre Ferment
150g Strong Bread flour
150g Water
3g Dried yeast
Main dough
250g Pre ferment
190g Water
295g strong bread flour (mine has a protein content of 13%)
20g Barley malt extract
20g Olive oil
12g Salt
80g seeds (40g sunflower seeds & 40g of pumpkin seeds)
Dough weight: 867g
Times & temps
My kitchen temperature: 32c / 90f
Oven temperature: Pre-heated to 220c / 430f with baking stone placed on the lower shelf
Oven setting: Bake mode (top & bottom heat with fan turned off)
Bake time: Bake 20 minutes covered with steam, bake for a further 20 minutes uncovered
Watch the tutorial on YouTube
Method
Preparing the pre-ferment
1. I like to prepare the pre-ferment the night before and leave it out overnight to ferment so its ready to bake with the next morning. Mix the ingredients for the pre-ferment together, cover and leave out to ferment for about 12 hours. The mixture will go through a process of rising and falling back down. Once this has happened the surface of the mixture will be scattered with small bubbles, either intact or broken open. The pre-ferment smells a little acidic, fruity and boozy.
The main dough
2. Add the water and 250g of the pre-ferment to a large mixing bowl and stir to break the ferment down a little. Add all of the other ingredients except the seeds. Bring everything together with a spoon. The dough will feel a little wet at this stage but it will firm up later when we add the seeds. The aim here isn’t to develop a smooth dough, just to make sure all of the ingredients are well distributed. Cover the bowl and leave to rest on your bench at room temperature for 20 minutes. This will give the flour a little time to take on some of the water and help with the kneading stage.
3. Turn the dough out on to your bench. I prefer not to use flour on my work surface at this stage as the sticky contact between the dough and bench helps with the kneading process. This is a little wetter than my normal doughs, so you could use an electric bowl mixer, but I’d encourage you to get your hands involved, it’s good practice for handling higher hydration doughs.
Picking the dough up and slapping it back down is a great technique for this dough (watch the video tutorial). The aim is to throw the dough down towards the bench so that some sticks to the surface while you are still holding some in your hand. This causes a stretching motion which helps work the dough. Fold the piece in your hands over the other end that’s stuck to the worktop and repeat. It doesn’t need to be exact, it’s not an exact science, it’s the working of the dough that’s important, not necessarily how its worked.
Work the dough for about 10 minutes or so. You will feel it becoming stronger and wanting to stay in one piece. Its elasticity will increase.
4. Now you can add the seeds. Rather than force the seeds through the dough and break the structure, try to use the same stretching and folding technique that you used to knead the dough. Once the seeds are evenly distributed you can shape the dough into a ball, place into the bowl, cover and leave out at room temperature to proof. The dough will be ready when it’s roughly doubled in size.
Shaping
5. During the proofing stage the seeds will hydrate and the dough should be a little easier to handle. Lightly dust the work surface with flour and turn the dough out of the bowl. Gently work it out into a rough square shape and fold it into three (as shown in the video). Roll the dough up onto itself so you have a large sausage. Cover and leave to bench rest for 5-10 minutes, this will give the dough time to relax again.
6. Flour your basket and place the dough in front of you with the coiled sides facing towards and away from you. Now the dough can be rolled into a large sausage not forgetting to seal off the seam when you get to the end. Place the dough into the basket, cover with a plastic bag and leave to proof.
The dough will be ready when it has risen and filled the basket. The dough should be well expanded, feel soft to the touch, slowly spring back when gently poked, but not feel like it is about to collapse (as shown in the video).
Baking
7. Turn the dough out on to a bread peel (or something smooth that you can transfer it to the oven with). Slide it on to the baking stone in the oven which has been preheated to 220c / 430f. The loaf will bake for the first 20 minutes covered with a large pot. You can lightly mist the inside of the pot with water before placing it over the bread, or you could add an ice cube under the pot once in place, both will add steam and help the dough rise nicely and develop a crackly crust. Remove the pot for the last 20 minute of cooking.
Check to make sure the loaf is cooked properly and then leave to cool on a wire rack.
If you enjoyed this blog and would like to support ongoing content creation and help keep the website ad-free, you can click below to make a contribution.
As an Amazon Affiliate, I may earn a commission from qualifying purchases
Tips & tricks
If you don’t have a basket big enough to proof this large loaf you can dived the recipe in half and make 1 or 2 smaller loaves.
If you don’t have a basket you could use a large mixing bowl lined with a clean t-towel and sprinkled with flour.
I used sunflower and pumpkin seeds but you can get creative and use your favourites.
I’ll have a video coming soon on different ways to proof dough, transfer dough to the oven and generate steam. So stay tuned!