Waste Not, Want Not, The Sourdough Discard Recipe

I try to keep my sourdough discard down to a minimum but depending on the recipe I’m working on, I may accumulate quite a bit of sourdough discard.
Surplice starter is a common problem when making a sourdough starter for the first time or when using a daily feeding routine.
I’m currently working on a sourdough starter project and it’s generated quite a bit of discard so I’ve set about designing a bread recipe that could utilise it and create an amazing loaf of bread.
As the amount of discard we have at any one time can vary I tweaked my original sourdough calculator to create a discard calculator.
This is easy to use and super handy for creating recipes using discard, you are more than welcome to use it, it’s in Google Doc format and completely free.
- The Vitals
- Equipment
- Substitutions
- Scheduling & Temperature
- The Recipe
- Bakers Percentages
- Watch the tutorial video
- Get the Recipe Calculator
- Quick Reference Printable Recipe
The Vitals
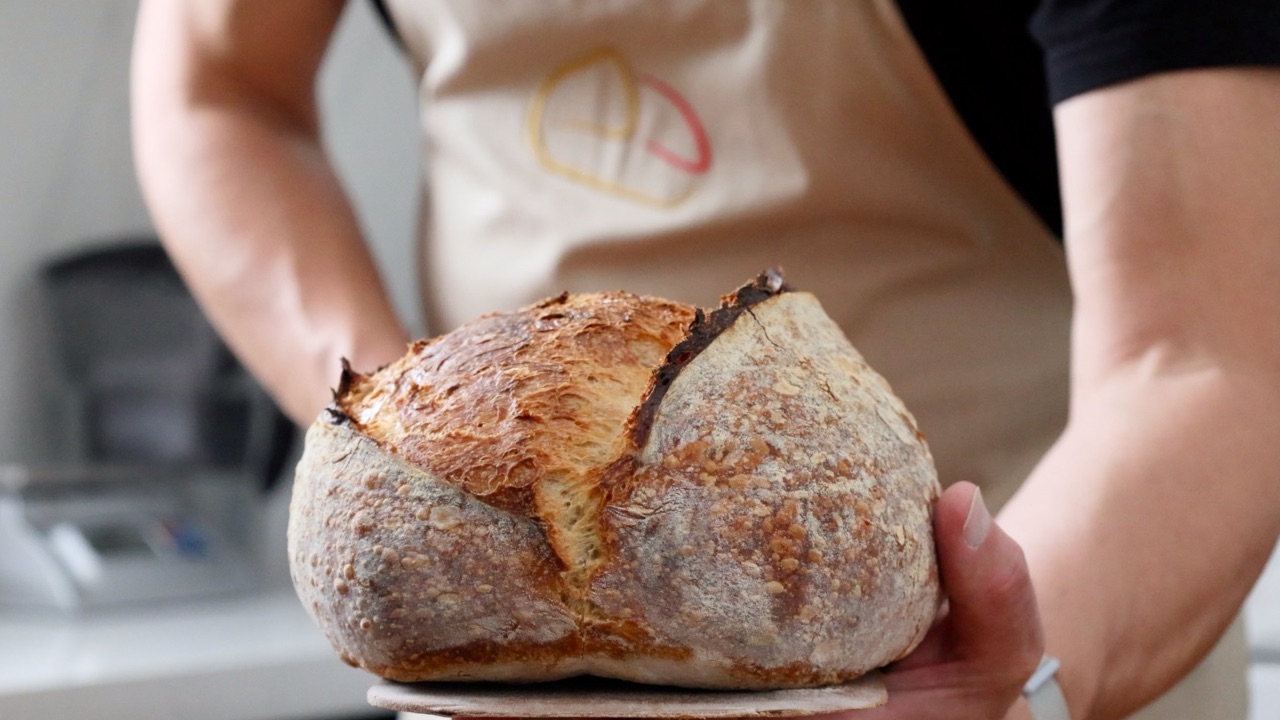
This recipe produces a beautiful farmhouse-style sandwich loaf. The wholewheat flour and barley malt syrup produce favour with depth and make you feel warm inside. It’s a homely loaf of bread.
The dough weighs 900 grams and uses 85% Strong bread flour and 15% stoneground wholewheat flour with 72% hydration. The recipe includes sourdough discard at 30% and pre-ferment at 30%
You’ll find the bakers’ percentage later in the recipe blog.
Equipment
You will need a mixing bowl and a good set of digital scales for making the dough.
This is a farmhouse loaf and is best baked in a bread tin.
A bowl and bench scraper makes life really easy but definitely isn’t essential.
As an Amazon Associate I earn from qualifying purchases.
Substitutions
Barley Malt
When I use barley malt syrup in a recipe I get asked if it can be substituted for molasses or honey. The simple answer is yes, but there are a few considerations.
Barley malt syrup isn't as sweet as molasses or honey so I would suggest adding a little less. I’m not adding the barley malt syrup for sweetness (although it adds a little), I’m adding it for the malt flavour. You can try using half the quantity of honey or molasses, just remember that the flavour profile will be quite different.
If you are going to use barley malt powder I’d suggest halving the quantity and seeing what the result is like. You can adjust if necessary the next time you use the recipe.
Yeast
I’m using instant dried yeast in this recipe. If you want to use fresh yeast you can double the quantity.
If you are using another type of dried yeast then use the same amount specified in the recipe.
Don’t stress over the amount of yeast too much. A little can go a long way and we are using a small quantity in this recipe to extend the pre-fermentation and the fermentation of the main dough.
It helps to think of yeast as speed control. The less you use the longer the process will take, the more you use the quicker things will go.
This can be helpful if you are working in a hot climate as reducing the yeast will slow things down.
Just remember that using a lot of yeast in a recipe produces a heavy commercial yeast flavour in the final product.
Whereas a longer fermentation process results in a beautifully textured and mature-tasting bread.
Flour
I am using strong white bread flour with a protein content of 13%. Any bread flour should be fine, this is going to be baked in a tin so we don’t need to worry about building a super strong dough.
I am using stoneground wholewheat flour but regular wholewheat flour will work perfectly.
Remember that different flours absorb different quantities of water so your dough consistency may be slightly different from mine.
If that’s the case you can adjust the amount of water next time you bake with the recipe.
Scheduling and temperature
I mix the pre-ferment 12 hours before I aim to make the dough. In the video that accompanies this recipe, I make the pre-ferment the night before at 23:00 and mix the dough the next morning at about 10:00.
Mixing the dough through to removing the bread from the oven takes four and a half hours with a kitchen temperature of 25C/77F.
The cooler your kitchen the longer the process will take, the warmer your kitchen, the quicker the process will go.
If your kitchen is really hot you can check out my blog on baking in hot climates.
The Waste Not, Want Not Recipe
The pre-ferment
First, we need to make a simple pre-ferment, it’s a mixture of flour and water with a touch of yeast. The beauty of this method is that we can create a vibrant yeast mixture with lots of flavours.
Ingredients
80g Strong bread flour
80g Water
0.8g Instant dried yeast
Add the water to a large jar or bowl, add the flour and the yeast and mix together with a spoon for a minute or so. Don’t worry about creating a super smooth mixture, the long fermentation will create a smooth mixture.
Remember to use a large jar or bowl as the mixture will triple/quadruple in size during the fermentation.
At a moderate temperature range of 18-25C / 65-77F, the pre-ferment ferment will be ready for use in about 12 hours.
If your kitchen temperature is creeping towards 30C / 86F I’d suggest leaving the pre-ferment at room temperature to get going, and then leaving it in the fridge to finish. Or you could reduce the fermentation time.
If your kitchen is quite cool, I’d suggest finding a warmer spot to keep your pre-ferment.
During the process, the pre-ferment will rise and then drop back down. The mixture will have lots of bubbles visible on the surface. You can see this clearly in the video that accompanies this blog.
Don’t stress too much! You can use a pre-ferment in its early stages or if it’s sat for a bit too long. Let’s just say there is a generous time window available to us.
The Main Dough
Now it’s time to make the main dough.
Ingredients
279g Strong white flour
76g Stoneground wholewheat flour
213g Water
10g Salt
152g Sourdough discard
152g Pre-ferment
1.8g Instant dried yeast
15g Barley malt syrup
Mixing
Weigh 213 grams of water into your mixing bowl followed by 10 grams of salt. Stir the mixture and make sure the salt is thoroughly dissolved.
Add 1.8 grams of instant dried yeast to the mixture (Don’t worry, the salt won’t kill the yeast), followed by 152 grams of sourdough discard and 152 grams of the pre-ferment (we made 160 grams which should account for any mixture stuck to the jar or bowl).
Add 15 grams of barley malt syrup to the bowl followed by the wholewheat flour.
Stir the mixture well with a spoon until everything is well incorporated. Now you can add the strong white bread flour.
Use a spoon to bring the mixture together until the dough is too stiff to mix properly. Now you can use a wet hand to finish it together into a rough dough.
It doesn’t need to be smooth at this point but you shouldn’t be able to see any dry pockets of flour.
Cover the dough and leave it to rest at room temperature for half an hour.
Kneading
Turn the dough out onto your work surface and knead it with the palm of your hand for about two minutes or so. Don’t worry if it’s a little sticky, keep working the dough.
Try not to use any flour to dust your worktop, it doesn’t help the kneading process and you will adjust the hydration of the dough.
Use the sticky contact between the dough, your hand and the work surface to help you knead. Use your bench scraper to clean your hand and the worktop down afterwards.
After kneading use your scraper to shape the dough into a rough ball and place it back in your bowl. Cover and leave to ferment at room temperature.
The dough will be baked in a bread tin so we don’t need to worry about building strength by kneading. The fermentation period will be enough time for gluten development to happen naturally.
Quick Stretch
After about an hour the dough should be rising nicely with about a 50-70% gain in volume.
Remove the dough from the bowl again and gently stretch it into a large rectangle. Fold one side of the rectangle into the centre and the other side on top. Now fold the top over the centre, and then the bottom over the remaining dough.
You should have a rough folded square of dough in front of you. The video at the bottom of this blog shows exactly how to do that.
Shape your dough into a rough ball, place it back into the bowl and leave it at room temperature to ferment.
The aim here isn’t to build strength it’s to extend the fermentation process. Gently de-gassing the dough means we can re-shape it and leave it to ferment once more without it rising too much and collapsing.
Shaping the dough
After another hour your dough should be roughly doubled in size.
Lightly dust the top of the dough and use a bowl scraper to gently release the dough from the bowl. Turn the floured surface of the dough face down onto the worktop.
Gently pull the dough into a rough circle and dimple the surface with your fingers. Fold one to the centre line of the dough, and then repeat with the other.
Aim to roll the dough into a sausage shape that’s the length of the bread tin.
Once the dough’s been rolled up you can place it into the bread tin with the seam facing down. Check the video below to see how to do this.
My bread tins are non-stick but I always give them a generous wipe with olive oil before placing the dough inside.
Cover the tin, I keep plastic bags for this purpose, but you can use whatever you like, but don’t restrict the dough from rising above the lip of the tin.
Time to bake
Once the dough has risen just above the lip of the tin it’s ready to bake.
Preheat your oven to 200C / 390F. The tin can be placed directly on the oven shelf there is no need to use a baking stone. In this case, the bread will take 40 minutes to bake.
If like me your baking stone lives in your oven, I’d suggest inverting a baking tray that sits between the stone and the tin to protect the bottom of the loaf during baking. I reduce my baking time to 35 minutes when I use this baking setup.
In both cases, I invert an oven shelf and place it beneath the oven element to protect the top of the loaf during baking.
I show the complete setup in the video below.
Once the loaf is baked remove it from the tin immediately and leave it to cool completely before slicing.
Now you can enjoy an amazing malty farmhouse sandwich loaf that leaves you feeling content and warm inside. This is one to keep for those autumnal days that are approaching.
If you enjoyed the recipe and would like to support ongoing recipe creation and help keep the website ad-free, you can click below to make a contribution.
As an Amazon Associate, I earn from qualifying purchases.