Be careful... fermenting sourdough at higher temperatures
I received a comment on one of my YouTube videos recently explaining that despite using the same ingredients as me (including flour), and following my procedure exactly their dough was harder to handle and tore easily during the stretching.
After a couple of emails backwards and forward I found out that Joanna’s kitchen temperature was hovering around thirty degrees Celsius (86F), compared to my twenty-five degrees Celsius (77F).
So I decided to do a comparison, making one dough at my room temperature, twenty-five degrees Celsius (77F), and one in my fermentation chamber at thirty degrees Celsius (86F).
Because the weather changes gradually throughout the seasons I don’t think I’d have noticed how different these two doughs behaved or felt if I hadn’t done this comparison.
The day before baking I placed all of the ingredients to make the 30C/86F dough into the chamber so that they were up to temperature before making the main dough. This way I could make sure that both doughs were mixed to the correct temperatures.
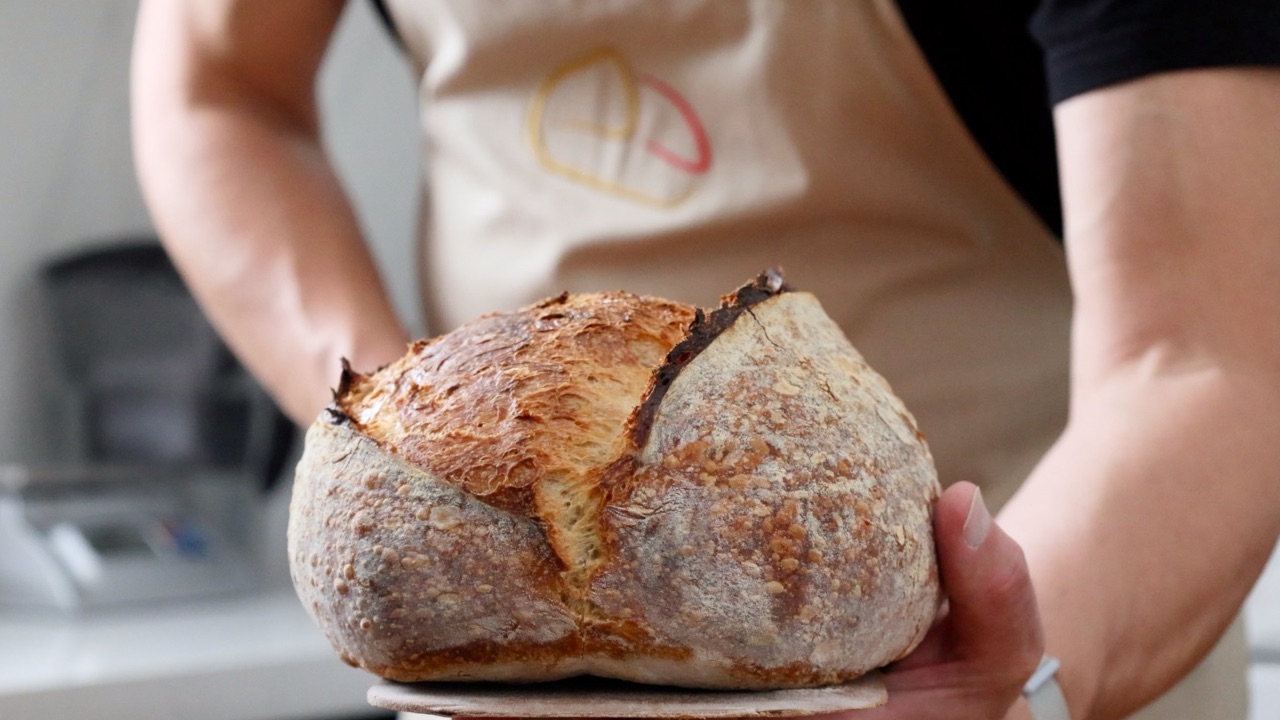
I made two identical doughs, weighing 850 grams at 70% hydration using a strong, 13% protein white bread flour.
While I wasn't working with the doughs, one was kept covered at room temperature and the other covered in my chamber.
Building a fermentation chamber for fermenting my sourdough
After the two doughs were mixed they rested at their respective temperatures for 15 minutes.
The control dough
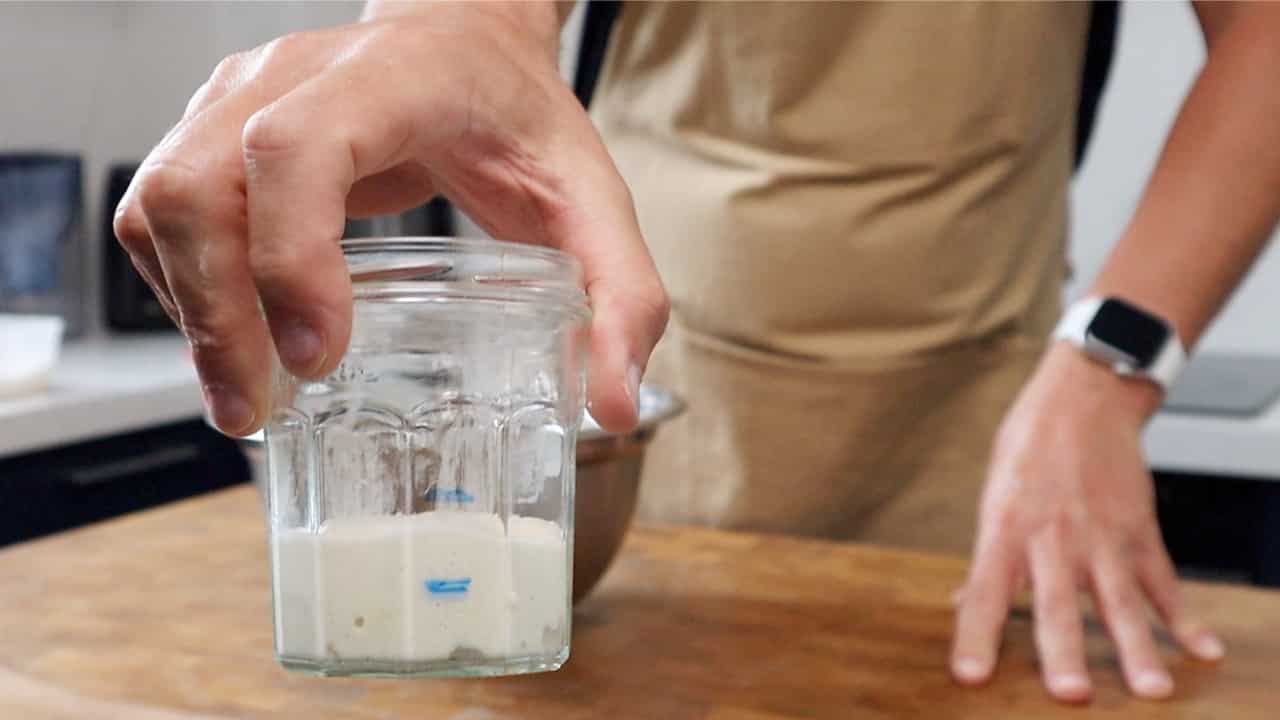
After 15 minutes I kneaded each dough for about one minute to make sure they were both well mixed and relatively smooth. I removed 100 grams of dough from each to use as a control piece to monitor the fermentation.
The control dough is placed into a jar and I compress it down with my fingers. I mark the outside of the jar to show where the dough comes to at this point.
Through recent experiments, I’ve worked out that this dough recipe produces a great loaf when the dough ferments and increases by 75% of its original volume.
After a quick measure (you can eyeball it), I make another mark to show where the dough needs to expand to reach a 75% increase in volume and complete its fermentation. The control dough should be kept with the dough you are fermenting to make sure they are fermenting at the same temperature.
Control dough after fermentation
If you watched my YouTube video where I did this experiment I explained that I had a bit of a tricky relationship with this control dough method. I'll explain why…
This control method works great if you want to do some comparisons and need benchmarks, or if you are just beginning your baking journey and have no idea how dough behaves when it's fermenting.
The danger is, that when we use this method continuously we might get a little lazy and neglect to observe the dough so that we can understand what is happening by using our senses.
So, if you are going to use it, make sure you keep a close eye on your dough to learn how the dough looks, smells and feels throughout the fermentation period. With a bit of practice, you’ll be able to judge when your dough is fermented properly. Then you won't need to rely on the control dough and can take the additional step out of your baking routine.
If you do use this method, don’t waste this piece of dough, you can remove the control piece from its jar and tuck it into the middle of the main dough before shaping. I’ve done this numerous times without any problems.
If I’m doing an experiment and for whatever reason can’t add it to the main dough, I pop it in the fridge and use it as a stiff starter in the coming days. It works just fine and keeps wastage to a minimum.
As I mentioned, I do like using this control dough method for experiments. I’m also exploring some other fermentation measuring techniques which I’ll keep you updated about in the community email.
Laminating
I’ve been working at 25C/77F for a month or so now, and before that, it was cooler, so the comparison between these two doughs was night and day.
I laminated the 25C/77F dough first, with no problems, but when it came to laminating the 30C/88F dough I automatically used the same amount of pressure and applied the same tension. The dough tore pretty much immediately, it felt sticky and I was starting to doubt myself, had I messed up the measurements when I made this dough?
After a 30 minutes rest, the doughs had a chance to build up a little more strength. During the second lamination, the 30C/86F dough didn't tear but I did notice just how stretchy it was! It was stickier than its companion and boy, I could swear I was working with a 75% hydration dough.
I guess I’d never really thought it through but the increase in dough temperature had made it more extensible and feel like it was softer… like a 75% hydrated dough.
This is worth keeping this in mind if you are comparing your dough to a picture or a video in a recipe. If you are working at higher temperatures your dough could well be softer, more extensible and feel more sticky, even if you use the same ingredients.
Fermentation period
Both doughs had been tucked away for their bulk fermentation. Time was always going to be a factor with the temperature difference.
The 25C/77F dough took 6.5 hours to increase by 75% of its original size. The 30C/86F dough was quicker out of the gate and hit 75% in just 5 hours. So it shaved a whole 1.5% hours off of the fermentation time.
When you are following a recipe have a look and see if it mentions the temperature and how long it took the dough to bulk ferment. This will give you an idea of whether you need to increase or decrease your bulk fermentation. Be prepared to make adjustments to suit your temperature as it’s likely it will be different to the temperature the baker experienced when writing the recipe.
Shaping
You won't get any prizes for guessing the differences during shaping.
I had the 25C/77F dough wrapped up easily and after a bath in rice flour, it sat happily in its basket.
I had gotten used to the feel of the 30C/86F dough. Rather than staying in a tight mass when I turned it out of the bowl, it slowly bled outwards, again, something I’d expect from a higher hydration dough. I need to use more flour to shape this dough, and as I was rolling it up, the dough just continued to stretch. If it took me six turns to complete the shaping for the 25C/77F dough, this one took twelve.
At higher temperatures, you may need to use more bench flour to stop your dough from sticking. I normally do a straight roll when I shape a batard but at higher temperatures, I may try a new shaping technique which encompasses a fold, so I’m not rolling continuously.
Proofing
Both doughs sat covered in their baskets at their respective temperatures for their final ambient proof.
The 25C/77F dough took 2 hours to proof properly and it was transferred to the fridge for 18 hours at 3C/37F.
The 30C/86F dough only took 1.5 hours to reach the same point. Interestingly the shape of the dough was completely different. It was flatter on the top and filled the basket more. I knew the dough would take longer to come down from 30C/86F in the fridge and was worried it might overproof. Nothing could be done now, so it was a case of popping it in the fridge with its companion and seeing what the next day would bring.
If you are proofing dough at higher temperatures and retarding the dough in the fridge, it's worth remembering that the dough will take longer to drop in temperature. It will continue to be proof for some time after going into the fridge. If you are worried about the dough over proofing you can reduce its ambient proof or cut it back completely and put the dough straight in the fridge after shaping.
 Baking
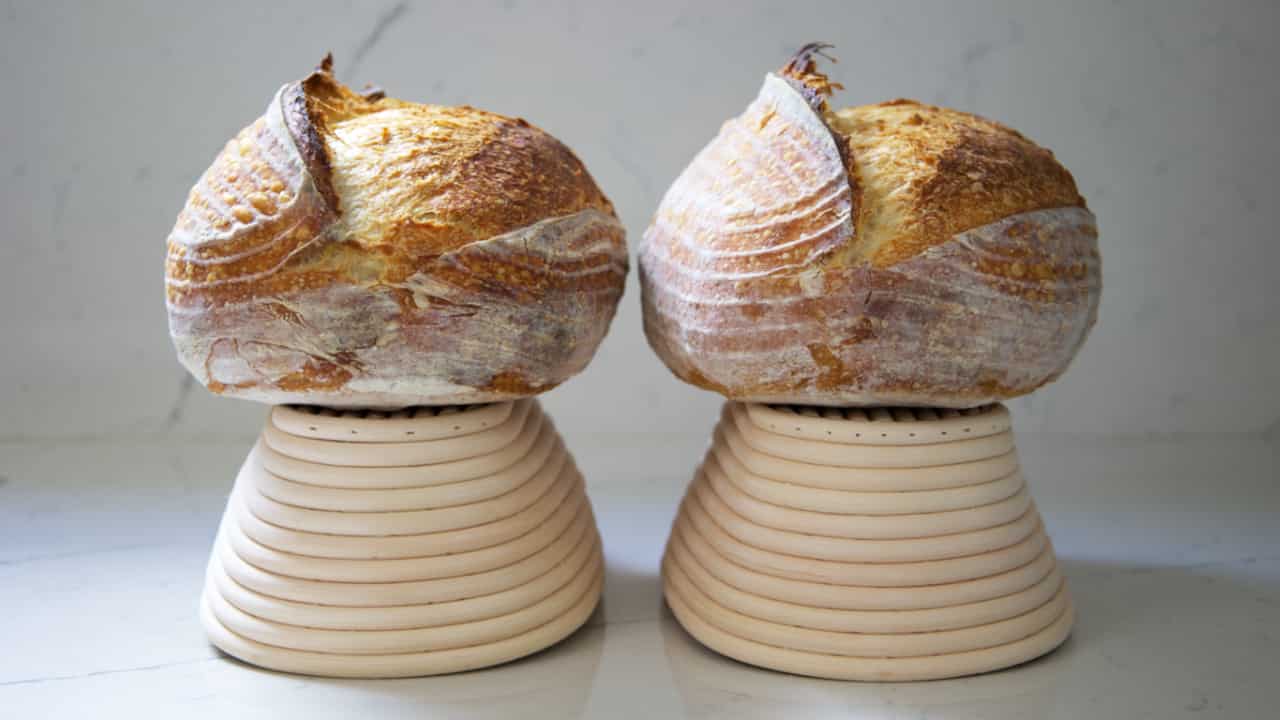
The next day before baking I compared the two doughs sitting in their baskets.
The 25C/77F dough was sitting up proud. It had retained its domed top and was completely dry. It turned out beautifully on the peel and didn’t drop. After a quick score, it went straight into the oven.
The 30C/86F dough had collapsed on the top, remember my fears about over-proofing? The top of the dough was covered in condensation, caused by the warmer dough temperature. I used more flour than normal before turning the dough out onto the peel as I was nervous it would stick. This dough dropped on the peel and the top slightly domed inwards. It was a little trickier to score too, not a complete nightmare, but the blade tended to snag, especially at the ends of the dough. In to the oven, it went.
Both doughs were baked on a baking stone that had been preheated in the oven to 220c / 430F. They were covered for the first 20 minutes of baking and baked for a further 25 minutes uncovered.
At warmer temperatures, there is a good chance your dough will have condensation on it after coming out of the fridge. Make sure you use enough flour to stop the dough from sticking to the peel (or whatever you use). I like to lightly brush the flour in with my fingers until the dampness has gone, and then I turn the dough out. I would rather use a touch too much flour than deal with dough sticking to my peel.
Adjusting the recipe
It's normal to make adjustments to a recipe. After all, we all use different ingredients and as we’ve seen in this blog, temperature plays a big part.
Don’t be afraid to dial the hydration down slightly if you feel your dough is a little sticky. And if you are working at really warm temperatures I’d suggest using a lower percentage of starter in your main dough. Another trick would be to use cold water to mix your dough to a lower temperature which will stop things from getting too warm too quickly.
You can download my free sourdough calculator to help you adjust hydration and the amount of starter you use. I’m also recording fermentation times, once that project is complete I’ll add the information to the calculator to give you time guides for fermentation.
Click here to explore the calculator
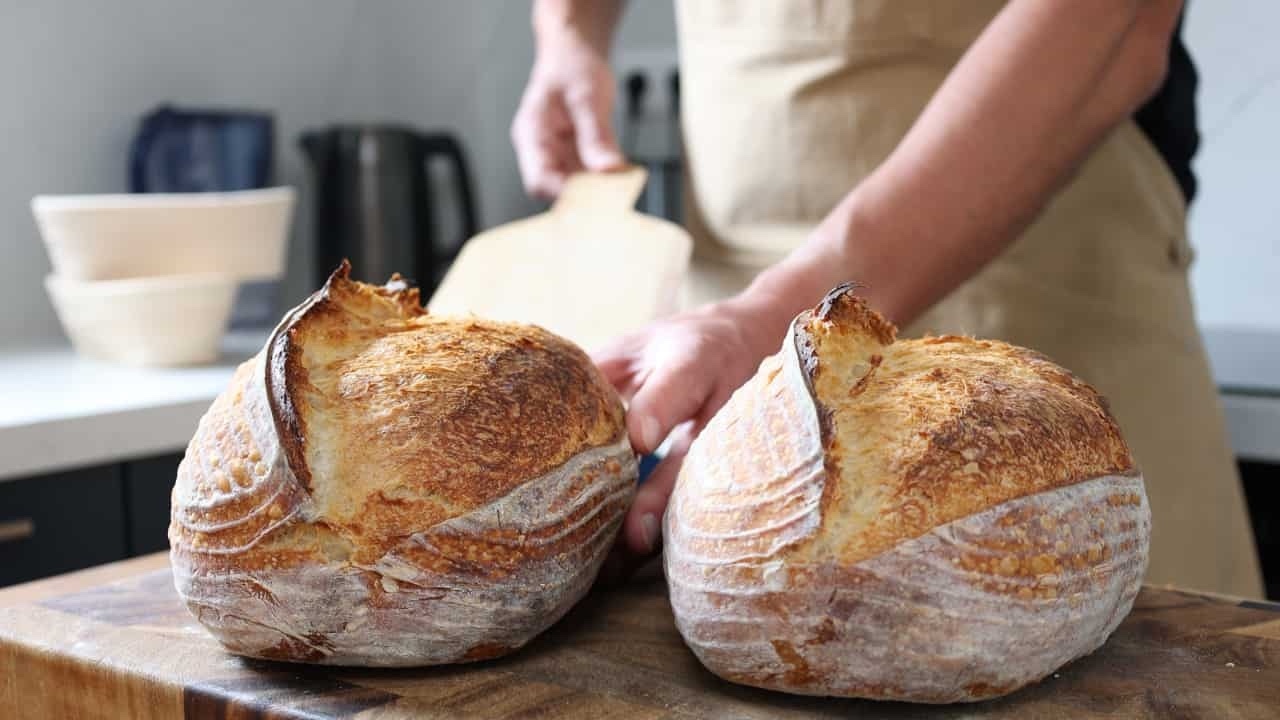
Result
Left: 30C/86F - Right 25C/77F
I have to say that I was both relieved and shocked that the 30C/86F loaf had come out in this condition. If I was a betting man I’d have lost a few quid.
I was super pleased with the result. From the beginning of this experiment, I wanted to see if I could produce similar results at different temperatures. And if anything I would say that I preferred the 30C/86F loaf, it’s got a little lower profile and, just kind of looks right, if you know what I mean.
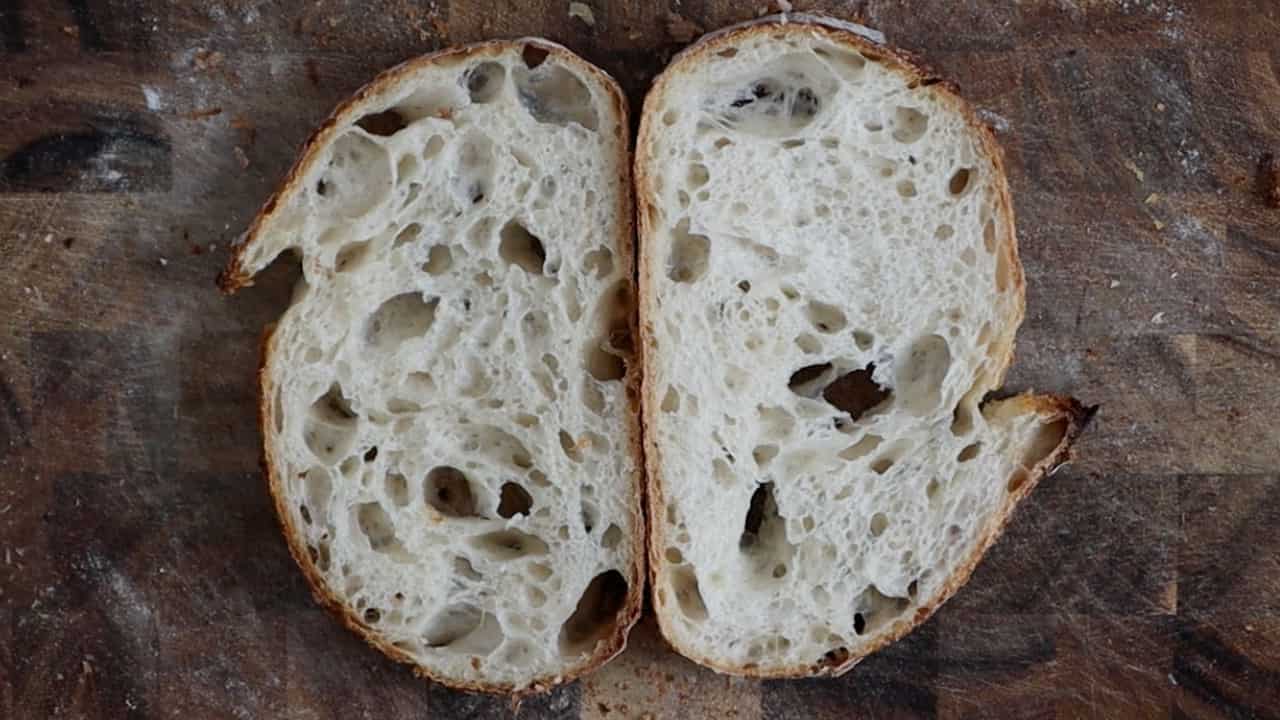
The crumb on both was pretty good. There were a few random holes on the 25C/77F loaf but nothing that worries me too much, perhaps an indication that I still need to work on catching the fermentation period just right.
Take a look at the video below. Do keep me updated on your baking, I enjoy the emails and the questions, and thanks Joanna!
If you enjoyed this blog and would like to support ongoing content creation and help keep the website ad-free, you can click below to make a contribution.
As an Amazon Affiliate, I may earn from qualifying purchases.