Molasses and Coriander Sourdough

The Design Brief
This loaf began with a recipe shared by Becky, one of our bakers inside Sourdough Unchained.
She had been experimenting with molasses in sourdough, and it immediately caught my attention. The more I thought about it, the more I felt there was an opportunity to build a loaf around molasses as the primary flavour.
After spending some time exploring possible flavour pairings, I kept coming back to coriander. The deep, dark, almost liquorice-like notes from the molasses felt like they could work beautifully alongside the bright, perfumed aroma of toasted coriander.
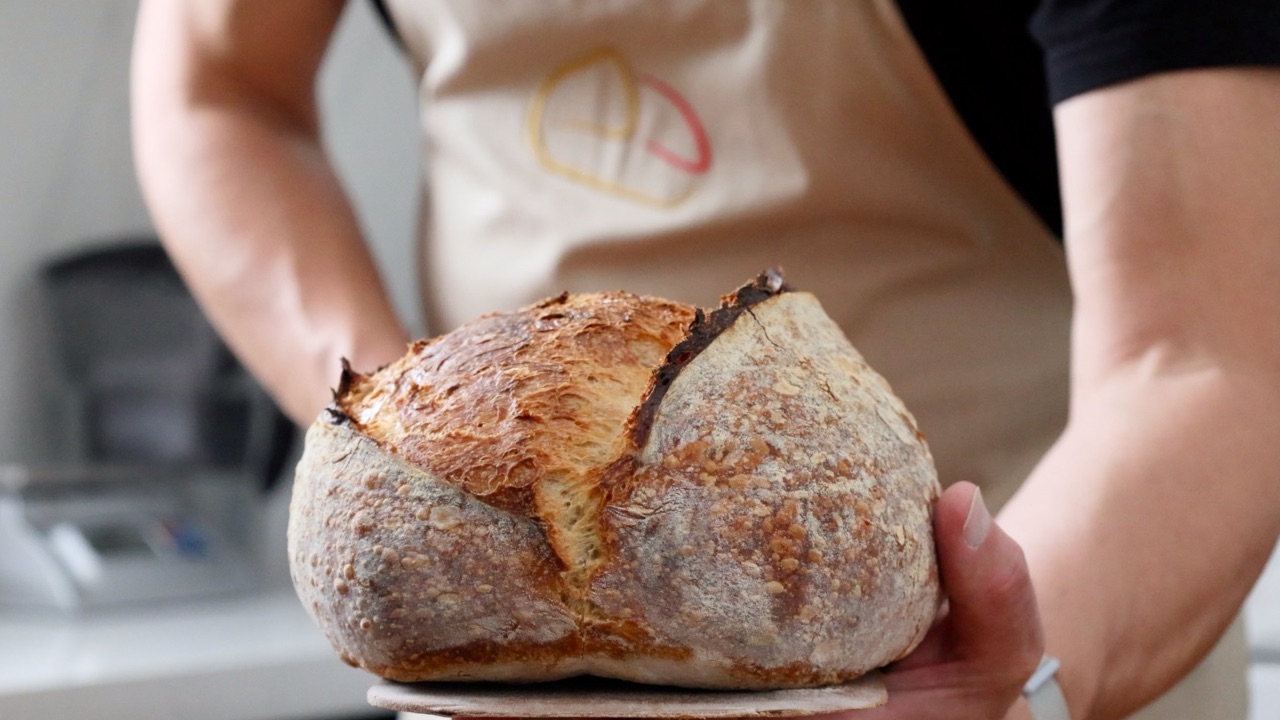
As we move through spring and into summer, I also wanted to keep the loaf relatively light in the hand and approachable enough for everyday baking. For that reason, I chose a simple country-style formula built around bread flour and rye, shaped as a batard.
From the start, the challenge wasn’t getting the coriander into the loaf. It was knowing how much to use. Too little and it disappears completely. Too much and it starts dominating everything else.
The goal was to create a loaf where the molasses remained the foundation of the flavour profile, while the coriander lifted and brightened it without becoming the main attraction.
Quick Navigation
Recipe Status
Version 1.0
Published: 04th May 2026
Last Updated: 04th May 2026
The recipe shown here is the one I’m currently baking. As new ideas emerge, new experiences are gained, and my understanding of the loaf deepens, this page may be updated to reflect that journey. The development notes below document the history of the loaf and the decisions that shaped it along the way.
Equipment used
I mixed this dough using the Ooni Halo Pro spiral mixer, although a batch of this size can absolutely be mixed by hand if that’s your preference.
For weighing ingredients, I used my My Weigh KD8000 for the main ingredients and a My Weigh Triton T3R for the coriander. When you’re working with small percentages like this, a good set of pocket scales is a must.
For the bake itself, I used my Brod & Taylor Baking Steel along with the Baking Shell.
If you’re curious about any of the equipment I use throughout my baking, you’ll find everything listed here in my Baking Kit.
Baking Timeline
Before we get into the timings, it’s worth remembering that these reflect my bake, not yours.
For this timeline, the dough was mixed in the Halo Pro spiral mixer, and both the starter and dough were fermented at a steady 25°C / 77°F in a temperature-controlled proofing chamber.
If you mix by hand, your timings may be slightly different. Your starter, ingredients, dough temperature and kitchen environment will all influence how quickly the dough develops.
Treat the timings below as a reference point and pay attention to what your dough is telling you along the way.
Formula Design
This formula produces 2 loaves, each using around 850g of dough.
The base is strong white bread flour, with 10% rye blended through it. I wanted the loaf to stay light and easy to handle, while still giving the molasses something a little warmer and more rounded to sit against.
The hydration is 70%, but I hold back 8% of the total water during the early stages of mixing. This helps the dough build strength more effectively in the spiral mixer before the remaining water is added gradually.
The molasses sits at 5%, which gives the loaf colour, sweetness and deep liquorice-like notes without making it feel heavy. The coriander sits much lower at 0.5%, but that’s enough to brighten the loaf and support the molasses without taking over.
Salt is set at 2%.
The result is a dough that’s easy to handle, balanced in flavour, and still very much in country sourdough territory rather than becoming a sweet or heavily spiced loaf.
Yield:
2x 850g doughs
2x 720g loaves (baked weight)
| (%) | (g) | |
| Strong white bread flour | 90% | 862g |
| Stoneground rye flour | 10% | 96g |
| Water | 62% | 594g |
| Water hold back | 8% | 77g |
| Salt | 2% | 19g |
| Molasses | 5% | 48g |
| Coriander | 0.5% | 4.8g |
| 1700g |
| (%) | (g) | |
| Strong white bread flour | 100% | 5g |
| Water | 100% | 5g |
| 10g |
| (%) | (g) | |
| Strong white bread flour | 100% | 91g |
| Water | 100% | 91g |
| Sourdough starter | 10% | 10g |
| 192g |
| (%) | (g) | |
| Strong white bread flour | 80% | 766g |
| Stoneground rye flour | 10% | 96g |
| Water | 52% | 498g |
| Water hold back | 8% | 77g |
| Salt | 2% | 19g |
| Levain | 20% | 192g |
| Molasses | 5% | 48g |
| Coriander | 0.5% | 4.8g |
| 1700g |
Using a sourdough recipe calculator is a great way of designing your own formulas or tweaking other bakers’ recipes to better suit your ingredients, schedule and climate.
You can download my free Magnus Jr sourdough calculator here.
Bake the recipe
Building the starter/levain
100g high-protein white bread flour
100g water
10g sourdough starter
Method:
1. Add the flour, water, and sourdough starter to a jar and mix thoroughly. (The jar should have enough headroom for the starter to quadruple in size.)
2. Cover with a lid and leave to ferment overnight.
Baker's tip: The recipe calls for 192g active starter, but we make slightly more levain than needed for the recipe to account for weight loss during fermentation, wastage, and to leave enough left over to seed our next levain. This build uses a low inoculation to keep acidity in check and support a balanced fermentation, and helps with scheduling.
The dough
766g high-protein white bread flour
96g stoneground rye flour
498g water
77g water (held back for mechanical mixing)
19g salt
192g active starter (from above)
Molasses 48g
Coriander seeds 4.8g (toasted & ground)
Baker's Note: I use my Ooni Halo Pro spiral mixer for doughs over 1000g. You can mix this by hand. I'll list both mechanical and hand mixing below.
Preparing the coriander
Toast the coriander seeds in a dry pan over a medium heat. I use a small cast-iron skillet, but any small pan will do.
They don’t need long. You’re just warming them until they smell fragrant and the oils start to wake up.
Once toasted, tip them out of the pan and let them cool before grinding. You can grind them in an electric spice mill or with a pestle and mortar.
Mechanically mixing the dough
1. Add the high-protein white bread flour and the stoneground rye flour to a mixing bowl and blend thoroughly.
2. Add the 498g of water to your mixer bowl.
3. Add roughly half of the flour blend, followed by the active starter. Mix with a spoon until the starter is well dispersed.
4. Add the remaining flour blend and bring everything together into a rough dough. It doesn’t need to be smooth at this stage. The goal is simply to make sure there are no dry patches of flour.
5. Cover the bowl and leave the dough to rest for 1 hour.
6. After the rest, transfer the bowl to the spiral mixer and begin mixing on low speed. I keep the Halo Pro at 15% speed, which is around 90 RPM, to help control the dough temperature.
7. Mix until the dough develops strength.
Baker's note: At this stage, I’m not looking for a full windowpane. I just want the dough to feel smooth and cohesive, with enough strength that it can stretch easily without tearing.
8. Add the 77g held-back water in 4 small additions. Allow the dough to absorb each addition and regain its structure before adding the next.
9. Once the water has been fully incorporated, add the salt and toasted coriander.
10. Continue mixing until the salt has been absorbed and the dough no longer feels gritty.
11. Add the molasses and continue mixing until the dough becomes smooth, supple and elastic.
12. Transfer the dough to a bulk fermentation container and leave it to rest for one hour before bench stretching.
Hand mixing the dough
1. Add the high-protein white bread flour and stoneground rye flour to a mixing bowl and blend thoroughly.
2. Add all of the water to a large mixing bowl, followed by the salt. Stir until the salt has dissolved.
Baker’s Note: My hand-mixing approach is different to the mechanical mixing method and does not use a water hold-back. When mixing by hand, all of the water is added at the beginning.
3. Add around half of the flour blend and mix with a spoon until you have a loose, porridge-like consistency.
4. Add the molasses, toasted coriander and levain, then mix everything through the porridge-like mixture with a spoon.
5. Add the remaining flour blend and bring everything together into a rough dough. It doesn’t need to be smooth at this stage, but there should be no dry pockets of flour. Cover and leave to rest for 30 minutes.
6. After the rest, tip the dough out onto the bench. Use the heel of your hand to press and smear the dough against the worktop, then fold it back over itself and repeat. You are not trying to fully develop the dough at this stage. The goal is simply to make sure everything is well mixed.
7. Transfer the dough to a bulk fermentation container, cover, and leave it to rest for 1 hour before the first bench stretch.
Stretching the dough
During bulk fermentation, I usually stretch the dough 2–3 times, depending on the length of the bulk fermentation.
The first stretch happens around 1 hour after mixing has finished, then the second stretch about 1 hour after that. If your bulk fermentation is around 5 hours from the initial mix, you’ll probably only have time for 2 stretches before it’s time to shape. If your bulk fermentation is longer, you may fit in one more.
Don’t over-stress this. Judging when to move through each part of the fermentation chain is far more important than whether you gave the dough one extra stretch.
1. Tip the dough out onto the work surface so the top of the dough is facing down.
2. Gently stretch the top of the dough out and fold it over the centre.
3. Repeat with the bottom of the dough, then both sides.
4. Flip the dough over, pull it gently into a ball, and place it back into the bulk fermentation container.
For this method, I’m stretching the dough on the bench, but lamination or coil folds in the bulk container will work too.
Shaping, proofing and cold retard
Pre-Shape
1. Once the dough has increased in volume by around 75%, lightly dust the top with flour and tip it out onto the bench so the floured surface is facing down.
2. Divide the dough into 2 equal pieces and gently shape them into loose dough balls.
3. Dust the tops lightly with flour and leave them to rest on the bench for around 20 minutes.
Final Shape, Ambient Proof & Cold Retard
1. By this stage, the tops of the dough balls should have dried slightly, allowing you to flip them over without needing any additional flour.
2. Fold the top of the dough over the centre, then repeat with the bottom. Rotate the dough 90 degrees. Working from the furthest point away from you, roll the dough back towards yourself while gently pushing forward to develop surface tension.
3. Once you reach the end, seal the dough together, then seal the sides.
Baker’s Note: Try to use the least amount of flour possible during shaping. Flour is great for stopping the dough from sticking to the bench, but it also stops the dough from sticking to itself, which is exactly what we need during shaping. Like most things in baking, balance is key.
4. Give the dough a generous coating of rice flour and place it into the banneton with the seam side facing upwards.
5. Place the bannetons into plastic bags to protect the dough from drying out or catching drafts during proofing.
6. Leave the dough to ambient proof until the dough reaches the top of the basket, then transfer it to the fridge for the cold retard.
Baker’s Note: My dough has been sized specifically for my bannetons, which is why I can confidently use the top of the basket as my proofing indicator. You can check out the bannetons I use in my Baking Kit.
Baking
1. Preheat your oven to 220°C / 428°F. I’m using the Brod & Taylor Baking Steel and Baking Shell for this bake, but use your preferred sourdough baking setup.
2. Remove the dough from the fridge, dust the top with flour, turn it out onto your peel, score it, and slide it onto the hot baking steel.
3. Cover the dough with the baking shell. I’m not using any ice or spraying the shell with water for this bake. I’m relying on the shell to trap the moisture released from the dough during the early stages of baking. This helps stop the crust setting too quickly and allows the dough to spring fully.
4. Bake covered for 20 minutes.
5. Remove the baking shell and continue baking uncovered for a further 25 minutes at the same temperature.
6. The molasses will help the crust colour quite quickly, so keep an eye on the loaf during the second half of the bake.
7. Once the crust has reached the colour and development you’re looking for, remove the loaf from the oven.
8. Leave the loaf to cool completely before cutting.
Flavour profile
The first thing you notice with this loaf is the aroma from the toasted coriander. It has that warm, perfumed quality that reminds me of walking into a spice shop.
The molasses gives the crumb a beautiful orange hue and brings deep, dark, almost liquorice-like notes to the flavour profile.
The coriander comes through afterwards, brightening everything up without taking over.
The rye is more subtle, but it does an important job in the background. It softens the loaf and adds a gentle warmth that helps the molasses and coriander sit together more naturally.
The loaf is slightly sweet, but it doesn’t feel forced or heavy. Everything feels balanced and at home.
Development notes
Why molasses and coriander?
This loaf began after Becky, one of our bakers inside Sourdough Unchained, shared a sourdough using molasses.
That immediately caught my attention because molasses brings such a distinctive flavour to bread. It’s dark, deep, slightly bitter, and almost liquorice-like.
Once I started thinking about possible pairings, coriander kept coming back as the ingredient that made the most sense. It has a bright, perfumed aroma that can lift the molasses without fighting against it.
Why keep this as a country-style sourdough?
Molasses and coriander could easily pull this loaf towards something much heavier, darker, or more obviously spiced.
That wasn’t what I wanted.
The goal was to create a loaf with a more complex flavour profile, while still keeping it light in the hand and approachable enough for everyday baking.
That’s why the formula is built around strong white bread flour, with just enough rye to support the flavour without turning the bread into a rye loaf.
Why 10% rye?
The rye is working quietly in the background.
At 10%, it softens the dough and the resulting loaf structure, adds a gentle warmth, and gives the molasses something more rounded to sit against.
But it doesn’t dominate the loaf.
That balance is important because I still wanted this to feel like a country sourdough first, rather than a rye bread with molasses and coriander added to it.
Why 5% molasses?
At 5%, the molasses brings colour, sweetness, and those deep liquorice-like notes without making the loaf feel sticky, heavy, or overly sweet.
It gives the crumb a beautiful, warm hue and softens the crust slightly, but the bread still eats like sourdough.
That was important because I wanted the molasses to shape the character of the loaf, not turn it into a sweet bread.
Why only 0.5% coriander?
This was the key part of the development process.
I started at 0.3% coriander and gradually worked up through successive bakes.
At 0.5%, the coriander gave the loaf a bright, perfumed lift that supported the molasses really well.
At 0.6%, the balance changed completely. The coriander became too dominant and started to take over the loaf.
For me, 0.5% is the sweet spot. Enough to notice, but not enough to become the main attraction.
Why toast the coriander?
Because the coriander is doing an aromatic job in this loaf.
Toasting the whole seeds briefly wakes up the flavour and brings out that warm, perfumed aroma before they’re ground.
I don’t want the coriander to taste harsh or dusty, which can happen with older pre-ground spices.
Freshly toasted and ground coriander gives the loaf a much brighter flavour.
What's next?
There are still a few directions I’d like to explore with this loaf.
The first is the flavour side. I’m curious to see whether black garlic or coffee could bring something interesting to the molasses without making the loaf feel too heavy or too dark.
I’m also thinking about the flour blend. At the moment, the rye is sitting at 10%, but I may test pushing that up to 20% to see if it gives the loaf more depth.
Another option is to introduce a little spelt, which could soften the edges of the flavour profile and bring a gentle sweetness.
Nothing is fixed yet. These are just the next ideas I’m interested in testing as the loaf continues to develop.
Nutritional Panel
| Per | 100g | 60g slice |
|---|---|---|
| Energy | 1028 kJ / 241 kcal | 617 kJ / 145 kcal |
| Fat | 0.9 g | 0.5 g |
| — of which saturates | 0.2 g | 0.1 g |
| Carbohydrate | 54.6 g | 32.8 g |
| — of which sugars | 2.4 g | 1.4 g |
| Fibre | 3.1 g | 1.8 g |
| Protein | 7.3 g | 4.4 g |
| Salt | 1.30 g | 0.78 g |
| Minerals | ||
| Iron | 1.5 mg | 0.9 mg |
| Calcium | 92 mg | 55 mg |
| Magnesium | 30 mg | 18 mg |
These are calculated estimates, not lab-tested values, worked out from this loaf's formula and CoFID (the UK food composition tables) against my loaf's baked weight. Your ingredients and your bake will shift the numbers. You can learn more about how I calculate this here.