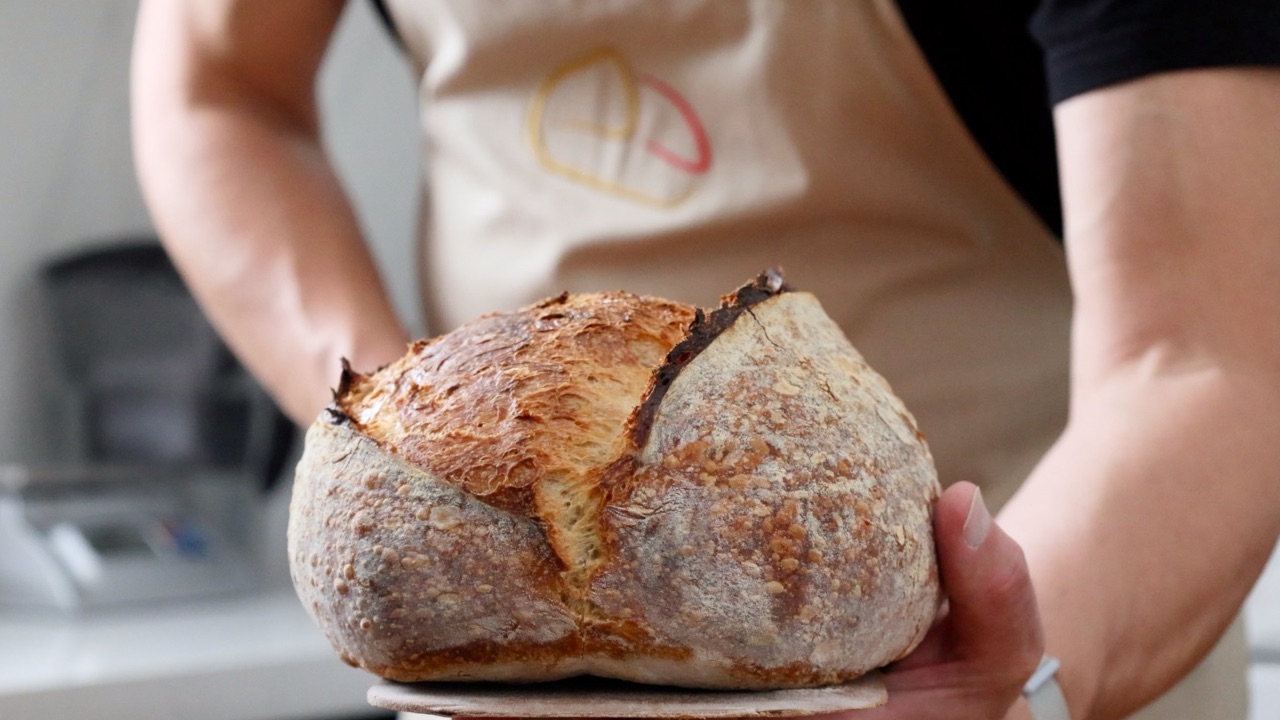
Easy No-Knead Sourdough Bread
In its simplest form sourdough bread is a natural fermentation of flour and water with a touch of salt for seasoning. Every time I bake sourdough I am still amazed at how these three ingredients come together to make one of the best loaves of bread in the world.
I’m going to explain how the no-knead process works and why it is a great method for beginner bakers. I’ll also explain which flour works best and give you a breakdown of the equipment required.
Table of contents and quick links below
- How the no-knead method works
- Choosing the right flour
- Why hydration matters
- Does my kitchen temperature matter?
- Sourdough equipment explained
- Setting up your oven to bake sourdough
- Recipe
- Resources and videos
The no-knead sourdough approach is relatively hands-off which makes it a great option for busy people and beginners. I frequently use this method to bake fresh bread daily.
Once you’ve baked sourdough using this no-knead method, it will be easy to move on to more complicated methods that include additional steps and take more time.
Why does the “no-knead”, or “no stretching and folding” method work
Most bread recipes made with commercial yeast require you to knead the dough to develop strength.
In sourdough baking, we can rely on the long fermentation period to naturally develop strength in the dough. We can also give it a helping hand by stretching or laminating the dough during the fermentation period.
The most popular technique is called stretching and folding. The baker performs several stretches while folding the dough back over itself in the bowl. This can also be done on the countertop and is often called lamination.
These techniques improve the strength, quality and handling of the dough.
When we make a no-knead sourdough (I guess it's technically “no stretching!”), we rely completely on the long fermentation period to develop strength in the dough.
Two proteins in the flour (glutenin and gliadin) play an important role. When the flour comes into contact with water during the mixing stage the process of developing strength begins. Over time a web of gluten is formed which traps the gas produced during the fermentation period and enables the dough to rise.
Over a long period, the dough can become strong without the need to knead!
If you want to read more about the proteins in the flour and how a strong dough is produced, read this article by article by modernist cuisine.
Choosing the right flour
As we are relying solely on time to create the strength in the dough I would suggest using a good quality bread flour. Choosing flour with a protein content of 12% and above will ensure it contains enough of the proteins responsible for developing strength.
The protein content is normally listed with the nutritional information on the bag of flour. If you buy your flour from a local mill or supplier they will know which flour will work best for bread.
You can substitute a little of the white bread flour for whole-wheat flour, I’d start with 5-10% and increase from there depending on the result.
It’s worth remembering that even wholewheat flour with a high protein content will make the dough softer and it won't develop quite as much strength. So if you are new to baking I’d suggest using 100% white bread flour.
Why hydration matters
Different flour will absorb different amounts of water and your dough will behave differently depending on the flour used.
My recipe creates a dough with 70% hydration. This means that the percentage of total water to total flour is 70%. (You need to take into account the water and flour in the main dough AND the starter to calculate this correctly).
This is a sensible hydration level and a good place to start. If you find the dough is a little sticky I would suggest following the recipe through and reducing the water a little next time you bake. Small adjustments are best, you will notice a difference in the dough by reducing the water by 2-5%.
This can be a little tricky to calculate if you aren’t used to baker's maths, so you can use my sourdough recipe calculator to do it easily and without running the risk of making mistakes.
Adjust sourdough recipes easily with my calculator
Is your kitchen too cold or too warm?
When the temperature in my kitchen is around 25C / 77F, I’m a happy chap. This is my ideal temperature as the dough develops enough strength before the fermentation process is complete.
If your kitchen is warmer the dough may ferment a little too quickly and may not develop enough strength before it completes its fermentation process.
During summer I use a chilly bin or a cool bag with one or two ice bricks to create a cool space where I can ferment my dough slowly.
Make sure that the ice brick isn’t touching the outside of the dough container, using a cooling rack or a tea towel as a buffer works great. Aim for a temperature around 25c / 77F.
If your kitchen is cooler the fermentation process may take too long and that can play havoc with the baking schedule, or the fermentation could stall and not get going properly.
In this case, you can find a warmer spot in your house for your dough container, just don’t put it on a direct heat source like a radiator.
In the winter I place a seedling heat mat in my chilly bin with a wire cooling rack over the top of it. The dough sits happily on the rack and I adjust the opening of the lid to regulate the heat which I monitor with a thermometer.
Here’s how I built a fermentation chamber which keeps a constant temperature in summer and winter
Don’t stress about temperature if you are at the beginning of your baking journey. As you become more experienced you will instinctively know when your kitchen is a little too warm or cold.
I would strongly suggest investing in two thermometers, one to measure the temperature of the dough and one to measure the ambient temperature. See the thermometers I use.
What equipment do I need to bake no-knead sourdough?
At the very least I would suggest that you have a good set of digital scales that measure in grams. Measuring by volume isn’t very accurate. Scales are relatively cheap and will help with consistency.
A bench scraper is an invaluable tool that makes handling dough easy. This tool will quickly become an extension of your hand and will be one of the first things you reach for when it’s time to bake. A worthy baking companion!
A bowl scraper helps to scoop the dough cleanly out of the bowl.
You’ll need a container to mix the dough. I use a large mixing bowl but a pot with a lid works well too.
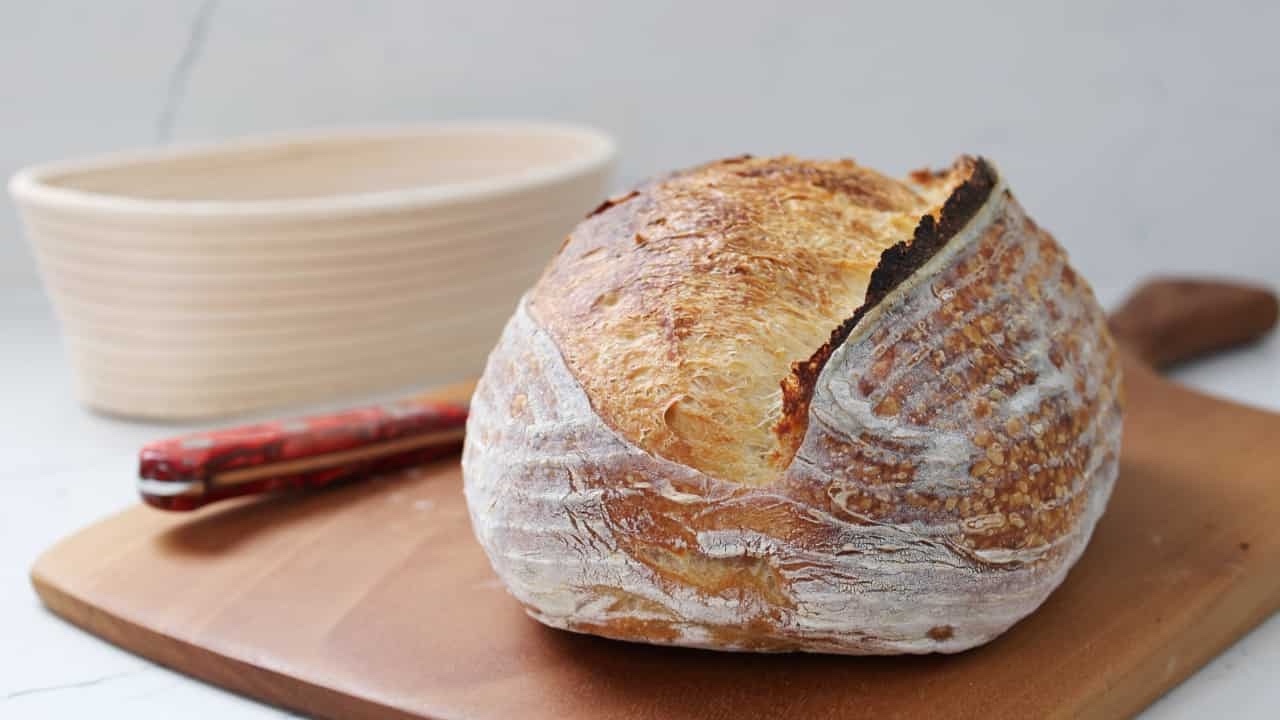
Once the dough has been shaped it needs to sit in something for its final fermentation period. You can use a bowl or a colander lined with a clean kitchen cloth dusted with flour. I much prefer using a proper proofing basket. I’d suggest an oval proofing basket or a round proofing basket that holds 750 grams of dough.
Dutch ovens are very popular for baking sourdough. For the first part of baking, the dough is baked inside the preheated dutch oven with the lid on. The lid is removed for the remaining baking time. Dutch ovens help with oven spring and crust development.
One of my favourite ways of baking sourdough uses a baking stone and pot combination as shown in the YouTube video linked at the end of this article.
Using a baking steel is also an option and a great choice if you bake pizza too.
Rather than use a dutch oven I prefer to use my challenger bread pan as it's easier to load. It’s also designed to take oval and larger loaves. It's great for cast iron pizza too.
A bread peel can be helpful to transfer the dough to and from the oven. I make my peels from offcuts of marine ply from the DIY store. But you can buy one of these peels quite cheaply, and they work great for bread and pizza.
I use a razor blade to score my dough. But I would advise that you invest in a bread lame. Lone razor blades can tend to get misplaced! Check out my article on the amazing wire monkey bread lames.
How do I set my oven up to bake sourdough?
Creating a little steam will result in a superbly textured crust and a great oven spring. Steam transfers heat quickly to the dough which helps it increase in volume. The steam also stops the crust from forming too quickly which also helps the loaf expand.
The simplest way to create steam is to place a baking tray at the bottom of the oven. Once the dough is placed on the oven shelf you add water to the tray at the bottom of the oven. After 20 minutes remove the pan from the oven so that the bread can finish baking in a dry environment.
Instead of using a tray or a pan to create steam, you can cover the dough during the first part of baking. This can be done by simply placing a large pot over the dough.
Preheating a baking stone or steel on the oven shelf will also help with the oven spring. The heat from the baking surface will transfer quickly to the dough. This is great when used in combination with the steam method.
You could also use a dutch oven. The dutch oven is preheated and the bread bakes inside the pot with the lid on for the first 20 minutes or so. The lid is removed from the pot and the bread finishes baking uncovered.
Recipe
NOTE: If you arrived here from my original no-knead YouTube video you will see that I have adjusted the recipe ingredients. The dough remains 70% hydration but I have reduced the amount of starter used. You can watch my updated no-knead sourdough video at the bottom of this blog.
- My kitchen temperature: 25C / 77F
- Bulk fermentation: 5 hours with a 75% increase in dough size
- Proof time in basket: 45 minutes at 25C / 77F and 18 hours cold-proof in the fridge
- Oven temperature: 220c / 430F - baked for 20 minutes covered, 25 minutes uncovered
Ingredients
90g Ripe starter (100% hydration)
260g Water
390g Flour (my flour has a protein content of 13.2%)
9g Sea salt
Method
1. Make sure that your starter has recently been fed and is nice and active. My starter is maintained at 100% hydration.
2. Add the water to a mixing bowl
3. Add the starter to the mixing bowl and roughly dissolve. Don't worry if there are small clumps, they'll break down during the process.
4. Next you can add your flour. I would advise using flour with a protein content of 12% or above (my flour is 13.2% protein). Strong bread flour will work perfectly. Now add the salt.
5. Mix the ingredients into a rough dough. It doesn’t need to be smooth at this stage. Cover the bowl and leave it out at room temperature to rest for fifteen minutes. This will give the flour time to hydrate a little.
6. Turn the dough out onto your work surface and gently work it for 15-30 seconds. This is to make sure the dough is properly mixed and not to build strength. Shape the dough into a ball. Pop it back into your bowl and cover it properly.
The dough is left to bulk ferment. The dough took five and a half hours to increase by 75% of its original volume at my kitchen temperature (25C / 77F). Remember that times will vary depending on temperature. Check the video to see how my dough looked after the fermentation period.
7. After the bulk fermentation is complete gently turn the dough out onto the work surface using a little flour to stop the dough from sticking. Fold the two sides of the dough over each other and roll the dough up so it resembles the shape of your basket and pinch the seam closed. Dust the dough with rice flour and place it into the basket with the seam facing upwards.
8. Cover with a plastic bag and leave it to proof at room temperature. This took forty-five minutes at 25C / 77F, but your times will be dependent on your temperature. Do not overproof. Check the video to see how the dough should look after the proof.
9. After the proof is complete you can place the dough into the fridge for an overnight rest ready for baking the next day.
10. Pre-heat your oven to 220c / 430f. If you are using a baking stone, steel or baking pan make sure they are pre-heated too. I bake my sourdough on a baking stone, covered with a pot for the first 20 minutes. I remove the pot for the final 25 minutes of baking.
If you enjoyed this blog and would like to support ongoing content creation and help keep the website ad-free, you can click below to make a contribution.
As an Amazon Affiliate, I may earn a commission from qualifying purchases
Resources and videos
Modernist cuisines article on flour protein and gluten development.
Diving deeper into the no-knead sourdough recipe
How to fit baking sourdough into a daily routine